Thursday, November 26, 2009

BLACK FRIDAY SPECIALS, Holiday Extravaganza, Holiday Gift Giving Guide & MORE

Dear Stampers,


Remember, TODAY is the day to save BIG!

These deals are so much better than a Black Friday sale. Why? You won't even have to brave the traffic and the crazy shoppers! :-)
*Holiday Online Extravaganza: Save 30 - 50% off of some of Stampin' Up's most popular items with the Online Extravaganza! THIS SALE IS AMAZING! A list of the items is noted below for your convenience. For all the sale details and to shop online visit my website. JUST CLICK HERE.

*Holiday Gift Giving Guide: You'll love the convenience of our Holiday Gift-Giving Guide! With gift ideas for kids, teens, neighbors, and more, it's your one-stop shop for all your holiday needs. Plus, when you spend $50 on products in the guide, you'll get a Décor Elements for FREE (up to a $16.95 value)!

In addition to SU!s great sale, I am adding TWO additional offerings:

*My Black Friday Special: TODAY, when you place an online order of at least $50 on my SU! website, you will receive a "credit" equal to 20% of your retail purchase to spend with me in January!

*Julie’s Blog Special: Go to this BLOG POST for an additional GREAT deal! Leave a comment on there, and I will apply your deal to when your order is placed.

Remember that when you order online your stampin' products are shipped right to your home! How easy is that!?

· Do your Christmas shopping and get a gift they'll love!

· Get a special gift for yourself and get a great deal!

Woohoo! So what are you waiting for? PLACE AN ORDER TODAY!

Happy Stamping,
Julie

Thanksgiving Blessings to You!


Monday, November 23, 2009

Don't Forget - SPECIALS

Don't Forget these fabulous Specials going on now until Monday the 30th.

ONLINE EXTRAVAGANZA
JULIE'S BLOG SPECIAL

SHOP EARLY AND SAVE!

BLACK FRIDAY

SPECIAL!


Place an online order, of at least $50, through my website (http://julietupper.stampinup.net) on November 27th and you will receive a "credit" to spend in January equal to 20% of your retail purchase.

You are eligible to combine the Black Friday Special with my current BLOG SPECIAL and the Online Extraveganza!


Note: If you are a Stamper’s Club Member, your credit may be used on your January club purchase! Yippee!

Thankful

This week is a time of Thanksgiving, and I give God thanks for the many blessings and trials [yes, even the trials] that have come my way.  This has been a tough year emotionally for me.  Why?  I don't know.  But, what I do know is that I am blessed.  God reminds me every day of His unfailing love through any means necessary.  He speaks His love to me where I am at, can hear and accept it....a hug from my son, the smile on my daughter's face, the graciousness of my husband to know when I need a hug verses to be given some space, a friend's caring and persistant calls to check in on me, my customers excitement to the my creations...  For these and many other things, I am thankful this year.  God is so good.

Take time in this busy season to remember why you are thankful, and if perchance you are having a tough time coming up with something.  Just stop, be still and listen for God to speak to your heart.  He is trying to get through to you.  If you cannot hear Him, just breathe.

Wow...that came out a lot more solemn than I anticipated.  Truely, I am thankful!

Sunday, November 22, 2009

Chocolate Chip Cardinal Christmas


My grandmother loved cardnials.  The Cardinal Christmas stamp set reminds me of her, so I stamp with it for only the most special cards to give to only the most special people in my life.  She was a fabulous woman and gave the best hugs!

Anywho, I used Shimmer Spray on this card's background, which I explained how to make in THIS POST.  Oh boy, DO I LOVE THIS STUFF!

Supplies:
Cardinal Christmas Stamp Set
Chocolate Chip Card Stock
Very Vanilla Card Stock
Basic Brown Classic Ink
Ruby Red Classic Ink
Garden Green Classic Ink
Pumpkin Pie Classic Ink
Aquapainter
Big Shot Die-Cut Machine
Petals-A-Plenty Embossing Folder
Shimmer Spray
5/8" Chocolate Chip Grosgrain Ribbon
Stampin' Sponges

Petals-A-Plenty Poinsetta Card


So, in my last post I told you about my passion for the Petals-A-Plenty Embossing Folder.  Well, here is another example of how I have used it.  It really decorates up a card FAST!  Like I said before...you have GOT to get your hands on this little tool!  So, so many ways to use it!

Supplies:
Berry Merry Stamp Set
Real Red Card Stock
Kraft Card Stock
Soft Suede Card Stock
Certainly Celery Card Stock
Whisper White Card Stock
Real Red Classic Ink
Soft Suede Classic Ink
Big Shot Die-cut Machine
Petals-A-Plenty Embossing Folder
Silver Brads
Paper Piercing Tool
Mat Pack
Scalloped Edge Punch
3/4" Real Red Grosgrain Polka-Dot Ribbon
Stampin' Dimensionals

Monday, November 16, 2009

Simple Cardinal Christmas, Petals-A-Plenty Embossing Folder & Shimmer Spray


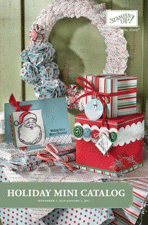
Hi Stampers -- I have as of late been obsessed with the Petals-A-Plenty embossing folder from the 2009 Holiday Mini Catalog on page 21.  It is what makes those fun little poinsetta flowers around the image of my cardinal.  Oh....so....fun!  I have seen many takes on how obtain the oval void in the card front.  I made an oval template out of my husband's disgarded comic book backboards.  It took a while to cut, and, though I am pleased with my inginuity, I decided that it was not the best way to get this look.  My favorite tutorial on this technique is done by Patty Bennett.  She does it with a thin wooden template.  Go check it out!  I went out and bought my own for $1.19!  Big spender...I know!

Another favorite new "toy" is Shimmer Paint!  Oh my...if you haven't tried this fabulous new bling for your creations, you don't know what you are missing!  Shimmery is the key word.  LOVE IT!  At the Portland, Maine SU! Regional, I saw Shimmer Spray for the first time.  One of the demonstrators had done this technique on her cards, and I just fell in love with it!  She was kind enough to give me a quick rundown on how to acheive this SHIMMERY look.  [I know it is hard to see on the card, but trust me it is there!]

HOW TO MAKE SHIMMER SPRAY

  • Simply take Hydrogen Peroxide and a small spray bottle. 


  • Fill the spray bottle with the Hydrogen Peroxide.


  • Dip the sprayer tube in the Shimmer Paint and then into the peroxide 5 or 6 times until the peroxide is shimmery.


  • Spray your cardstock and let dry for 5-10 minutes.  DONE!

Stampin' Supplies
Teeny Tiny Wishes Stamp Set
Soft Suede Cardstock
Sahara Sand Cardstock
Very Vanilla Cardstock
Basic Black Ink
Real Red Ink
Modern Label Punch
Word Window Punch
Big Shot Die Cut Machine
Petals-A-Plenty Embossing Folder

Shimmer Spray
2-Way Glue
Fine Cosmo Glitter - Red

Sunday, November 15, 2009

JULIE'S BLOG SPECIAL

JULIE'S BLOG SPECIAL:
When you place an online order between now and November 30th, you will...
  • Be entered in a raffle to win a $20 Stampin' Up! shopping spree from me, plus a Mystery Stamp Set from my Stampin' Closet!
  • Earn a raffle ticket for every $25 ordered [i.e. purchase $75 and recieve THREE raffle tickets!] 
Imagine...you could purchase My Digital Studio for $79.95 [plus S/H] and earn a $16.95 Decor Element. And, possibly earn a $20 SU! shopping spree AND a Mystery Stamp Set! That is potentially $140 in product for $80!

Woohoo! So what are you waiting for? PLACE AN ORDER TODAY!

Blog Header

Oh, and by the way, I used My Digital Studio to create my new Blog Header! I just love that program! You seriously have got to get your hands on it.

To ORDER go to my website at http://julietupper.stampinup.net , click on "SHOP NOW", and enter Item #118108 to place your My Digital Studio order. NOTE: Since your purchase is in the Holiday Gift Giving Guide and over $50, you will receive a FREE $16.95 Decor Element! Go to the Definately Decorative Brochure to pick yours today!

*This was my first blog header....bright, cheery and impossible to match colors to make the blog look nice! So, I went back to the drawing board.

Finally DONE!

So what do you think?  I am thouroughly pleased with my blog's new look!  Woohoo!  It took me a while to figure out what I wanted to do, but I finally got it!  Leave me a comment and let me know what YOU think.  Even if you have constructive critisizim, that is fine by me!

Saturday, November 14, 2009

Construction

Hi all -- I am revamping my blog, so please bear with me!  Thank you! --Julie

Friday, November 13, 2009

Happy Bearthday -- How Cute Is She?

The 2009 Holiday Mini Catalog has so many fabulous new items and the Build-A-Bear Collection is one!  Oh...so...CUTE!  Check out this sweet card I made with the Beary Best Friends stamp set.


Instructions:
1. Adhere 2” So Saffron DSP ½” from the bottom of Kraft gift card. Punch two holes at either side of small DSP strip, add Silver brads, then adhere above the large piece of DSP.
2. Punch a 3/16” hole ½” in and down on the right side under the small DSP strip. Tie Close To Cocoa Polka-dot Grosgrain Ribbon around front of card. [Ask for tips on how to tie a “stay-put” bow.]
3. Pierce row of holes above DSP using paper-piercing tool.
4. Stamp girl bear image in Jet Black StazOn ink on watercolor paper. Watercolor image using Stampin’ Write Markers and Aquapainter. [Tip: Use the Aquapainter to slightly wet the Watercolor Paper where you want to apply the color. Take your marker and apply small amount of color around the edges. Use the Aquapainter to blend the color inward. Add more ink as needed.] Rich Razzleberry = dress, flower; Soft Suede = arms, legs, head; Mellow Moss = ground; Going Gray = shoes; and, So Saffron = balloon
5. Round corners of watercolor paper using Corner Rounder punch and adhere to card using Stampin' Dimensionals.
6. Stamp "Happy Bearthday" in Jet Black StazOn ink on DSP underneath girl bear.
Stamps  
  • Beary Best Friends stamp set, Mini – p.34
  • Beary Nice Wishes stamp set, Mini - p.36
Paper

  • Kraft card stock, 11”x 4¼”, p.159
  • So Saffron Designer Series paper, 2 ½” x 4¼”, ½” x 4¼”, p.161
  • Watercolor paper, ½ sheet, p.158
Ink

  • Jet Black StazOn Ink pad, p.190
  • In Color Stampin’ Write Markers, p.155
  • Going Gray Stampin’ Write Marker [Assorted only], p.155
  • So Saffron Stampin’ Write Marker, p.157
  • Mellow Moss Stampin’ Write Marker, p.157
Accessories

  • Soft Suede ½” Grosgrain Ribbon, p.182
  • Silver brads, p. 179
  • Stampin' Dimensionals, p.192
  • Aqua Painter, p. 192
  • Paper-piercing tool, p.191
  • Cropodile, p.191
  • Mat Pack, p.191
  • 3/16" Corner Rounder punch, p.186
  • 1/16” Circle Punch, p.186

Sweet Treat Cup Sunflower Card


O.K., so, I am well aware that Christmas is just around the corner and Thanksgiving is even closer.  However, I finally figured out what this stamp is for out of the 2009 Holiday Mini Catalog and just HAD to share this card with you. 

The Sweet Centers stamp set has six stamps in it:  a "hot air balloon", an "ornament top", a "heart", an "'Eek You're Sweet' Square", "leaves", and .....what is that other thing?!?  My husband and I pondered it for quite some time and came up with some of the weirdest ideas...."A tongue?  Nah!  Stampin' Up! wouldn't do that!"  Sheesh!  So, I put the set away for a bit and pulled it out again before my Mini Catalog Stamp Camp in September.  Ahha!  I ran upstairs exclaiming, "It's a PETAL!  A PETAL!  Hence the leaves, duh!"  My husband stared at me like I had lost my mind.  Phew!  Took me forever to figure it out, but I finally got it.  I know, I know....not too bright....or perhaps you wondered what it was, too.  Hahaha!

Anywho, if you have not had the chance to view the 2009 Holiday Mini Catalog, please email me at julietupper@gmail.com and I will send you a FREE copy!  It is fabulous! 


So, here is my Sweet Treat Cup Sunflower Card.  I just LOVE it.  I stamped the petal from point to point around a 1-3/4"Circle Template that I made with the 1-3/4" Circle Punch that coordinates nicely with the Sweet Treat Cups.  Then, I stamped it again layering the petal stamp in between two stamped petal images.  This gives the double flower look.  LOVE IT!  Fill your Sweet Treat Cup with Mini Chocolate Chips.  The only thing that I forgot to do was make a "door" inorder for the receiver to get the chocolate chips out.  Oh well!  Live and learn!


INSTRUCTIONS:

1. Fold your gift card. Adhere Chocolate Chip CS. Tie ribbon.
2. In Garden Green Ink, stamp “leaves” on Old Olive CS. Cut out and set aside.
3. In Summer Sun Ink, stamp “petal” SIX OR SEVEN times in a circle. [Tip: Use the “Circle Template” to line up the curve of the petal.] LAYER “petal” stamp in between two flower petals and stamp again to create a fuller flower image. Trim the flower.
4. Add Dotto to the back of the flower. Line up, stick on the Glass Mat, and cut a 1 ¾” circle in the middle.
5. Adhere the “flower” on top of the Sweet Treat Cup. [Tip: The remaining Dotto should keep it in place. If not, add some SNAIL to the edge of the flower.] Pile the chocolate chips onto the Chocolate Chip CS. Adhere “flower” by pulling off the white liner and centering over the Chocolate Chip CS.
6. Add leaves with SNAIL.

Stamps
Sweet Centers stamp set, Mini – p.6
Think Happy Thoughts Stamp Set

Paper
Old Olive, scrap, p.156
Chocolate Chip, 4”x4”, p.156
Whisper White, 4”x4”, p.155

Ink
Summer Sun Classic Ink, p.156
Garden Green Classic Ink, p.156
Staz On – White, p.190

Accessories
Dotto, p.192
Paper Snips, p.191
Circle Scissors Plus, p.191
Glass Mat, p.191
Sweet Treat Cups, Mini – p.6
Chocolate Chip Striped Grosgrain, p.183
Chocolate Chips, grocery store

Wednesday, November 11, 2009

My Digital Studio CARDS

O.K., so Stampin' Up!s NEW My Digital Studio absolutely ROCKS!  I am so excited to have on the go creating with me no matter where I go!  I love all the choices that can be made with it. 

Let's talk about CARDS with MDS.  Love the template ideas.  Love the images.  LOVE IT!  Here is the card that SU! presents in the MDS commercial.  Yes [in case you are wondering] I really did watch it and replay it a bunch of times to figure this card out!  Really love the colors, the text, the layout.  Super easy to duplicate, but I love turning this creation into a Hybrid card...like they do in the MDS Commercial.  So, here it is! 

 Oh, and, click here to view the MDS Commercial.  YOU HAVE GOT TO GET THIS PROGRAM!!!

Lovely As A Tree Matted Card

Last year's Stamp-A-Stack included this fabulous card, too!  I love the matted snowflakes behind the tree!  So, pretty!  O.K., so I got the idea for this card off Beate John's blog last year.  She credits her inspiration from Julie Buhler's card.  Both ladies have fabulous blogs and ideas!

Comments: Fold Whisper White CS in half. Adhere Handsome Hunter CS to the card front. Lay the ¾” Border Template that I made over the Kraft CS and wheel with the Snowflakes. Then, sponge with White Craft ink in the center and remove template when done. Ink the tree with Handsome Hunter Classic ink and use a Blender Pen and Chocolate Chip Ink Pad to color over the stem. Stamp it on the right hand side of the rectangle. Stamp “Merry Christmas” in Chocolate Chip by using the Stamp-A-Ma-Jig to help you line it up. Using the Paper Piercing Tool, Guide and Mat from the Crafter’s Tool Kit, pierce a border around the white rectangle. Layer onto Chocolate Chip CS. From provided scrap CS, punch 1” Chocolate Chip circle and SNAIL to the upper left hand side. Using the Cropodile punch 3/16” hole and set a Jumbo Eyelet. Tie your White Taffeta Ribbon through the hole and adhere layer to card with SNAIL.


Stamp Sets:
 Lovely As A Tree
 Snowflake Wheel
 All Holidays


Inks:
Classic Stampin’ Pad®, Handsome Hunter
 Craft Stampin’ Pad®, Whisper White
 Classic Stampin’ Pad®, Chocolate Chip
 Stampin’ Write Marker®, Chocolate Chip
 Standard Wheel Cartridge, Uninked
 Ink Refill, Whisper White


Paper:
 Whisper White Card Stock, 5½” x 8½”
 Kraft Card Stock, 3¾”x 5”,
 Chocolate Chip Card Stock, 5¼” x 4”
 Handsome Hunter Card Stock, 5 ½” x 4¼”,
 Whisper White Envelope, Medium


Accessories:
 Stamp-A-Ma-Jig
 Crafter’s Tool Kit, Paper Piercing RETIRED
 1” Circle Punch
 Taffeta Ribbon, Whisper White, 4”
 Jumbo Eyelets, Antique Brass
 Cropodile
 Stampin’ Sponge
 Blender Pens

Watercolor Die-cut Snowflake Chunky Glitter Card

My Customers made this glittery card at last years BIG Christmas Stamp-A-Stack.  Looks hard, but is really easy!  NOTE:  The word stamp is from Punches Three which is a retired Hostess set from the last catalog.  If you do not have it, feel free to replace it with another saying stamp.  Enjoy!

Comments: Fold the Whisper White CS gift card. Adhere Night of Navy CS to card front. Using Watercolor Wonder Crayons color streaks across the Watercolor Paper from top to bottom: Night of Navy, Ballet Blue, Brocade Blue, Ballet Blue, Night of Navy. Blend colors with the Aquapainter. Allow to dry. [This paper will curl up when wet, but will dry flat.] Die-cut SIX small snowflakes [2 Night of Navy, 4 Whisper White]. Adhere the Watercolor Paper to the card front. Adhere the white snowflakes with one Mini Glue Dot each. Adhere other snowflakes to top. Ink “A very merry…” by brushing Night of Navy Marker across the image and stamp on provided scrap Whisper White CS. Punch out with the Scalloped Square Punch. Trim with Paper Snips and adhere with Stampin’ Dimensionals. Place card in Powder Pal® tray. Apply 2-Way Glue in swirls to card front and across some of your snowflakes. Cover with glitter, then tap the card stock firmly to remove excess glitter. Pour glitter into jar.
Stamp Sets:
 Punches Three RETIRED

Inks:
 Stampin‘ Write Marker, Night of Navy
 Watercolor Wonder Crayons, Rich Regals
Paper:
 Whisper White Card Stock, 5 ½” x 8 ½”, scrap
 Night of Navy Card Stock, 4 ¼” x 5 ½”, scrap
 Watercolor Paper, 5” x 3 ¾”
 Whisper White Envelope, Medium

Accessories:
 Aquapainter
 Powder Pal® Trays
 Stampin’ Glitter, Chunky Essentials
 2-Way Glue Pen
 Scalloped Square Punch
 Mini Glue Dots®
 Paper Snips
 Sizzix Die 4-Pack, Snowflakes Set #2
 Big Shot Die-Cut Machine
 Stampin’ Dimensionals

Sorry

So, it has been a while.  Sorry, Stamper's, but this Fall season has taken it's toll on me.  I have created many, many fabulous things, however time has flown by and taking pictures of everything has not been on the top of my list.  I hope you understand.  However, I am back and ready to share consistantly!  Enjoy!
Related Posts with Thumbnails