Showing posts with label Glitter. Show all posts

Monday, November 16, 2009

Simple Cardinal Christmas, Petals-A-Plenty Embossing Folder & Shimmer Spray


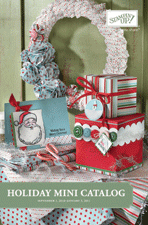
Hi Stampers -- I have as of late been obsessed with the Petals-A-Plenty embossing folder from the 2009 Holiday Mini Catalog on page 21.  It is what makes those fun little poinsetta flowers around the image of my cardinal.  Oh....so....fun!  I have seen many takes on how obtain the oval void in the card front.  I made an oval template out of my husband's disgarded comic book backboards.  It took a while to cut, and, though I am pleased with my inginuity, I decided that it was not the best way to get this look.  My favorite tutorial on this technique is done by Patty Bennett.  She does it with a thin wooden template.  Go check it out!  I went out and bought my own for $1.19!  Big spender...I know!

Another favorite new "toy" is Shimmer Paint!  Oh my...if you haven't tried this fabulous new bling for your creations, you don't know what you are missing!  Shimmery is the key word.  LOVE IT!  At the Portland, Maine SU! Regional, I saw Shimmer Spray for the first time.  One of the demonstrators had done this technique on her cards, and I just fell in love with it!  She was kind enough to give me a quick rundown on how to acheive this SHIMMERY look.  [I know it is hard to see on the card, but trust me it is there!]

HOW TO MAKE SHIMMER SPRAY

  • Simply take Hydrogen Peroxide and a small spray bottle. 


  • Fill the spray bottle with the Hydrogen Peroxide.


  • Dip the sprayer tube in the Shimmer Paint and then into the peroxide 5 or 6 times until the peroxide is shimmery.


  • Spray your cardstock and let dry for 5-10 minutes.  DONE!

Stampin' Supplies
Teeny Tiny Wishes Stamp Set
Soft Suede Cardstock
Sahara Sand Cardstock
Very Vanilla Cardstock
Basic Black Ink
Real Red Ink
Modern Label Punch
Word Window Punch
Big Shot Die Cut Machine
Petals-A-Plenty Embossing Folder

Shimmer Spray
2-Way Glue
Fine Cosmo Glitter - Red

Wednesday, November 11, 2009

Watercolor Die-cut Snowflake Chunky Glitter Card

My Customers made this glittery card at last years BIG Christmas Stamp-A-Stack.  Looks hard, but is really easy!  NOTE:  The word stamp is from Punches Three which is a retired Hostess set from the last catalog.  If you do not have it, feel free to replace it with another saying stamp.  Enjoy!

Comments: Fold the Whisper White CS gift card. Adhere Night of Navy CS to card front. Using Watercolor Wonder Crayons color streaks across the Watercolor Paper from top to bottom: Night of Navy, Ballet Blue, Brocade Blue, Ballet Blue, Night of Navy. Blend colors with the Aquapainter. Allow to dry. [This paper will curl up when wet, but will dry flat.] Die-cut SIX small snowflakes [2 Night of Navy, 4 Whisper White]. Adhere the Watercolor Paper to the card front. Adhere the white snowflakes with one Mini Glue Dot each. Adhere other snowflakes to top. Ink “A very merry…” by brushing Night of Navy Marker across the image and stamp on provided scrap Whisper White CS. Punch out with the Scalloped Square Punch. Trim with Paper Snips and adhere with Stampin’ Dimensionals. Place card in Powder Pal® tray. Apply 2-Way Glue in swirls to card front and across some of your snowflakes. Cover with glitter, then tap the card stock firmly to remove excess glitter. Pour glitter into jar.
Stamp Sets:
 Punches Three RETIRED

Inks:
 Stampin‘ Write Marker, Night of Navy
 Watercolor Wonder Crayons, Rich Regals
Paper:
 Whisper White Card Stock, 5 ½” x 8 ½”, scrap
 Night of Navy Card Stock, 4 ¼” x 5 ½”, scrap
 Watercolor Paper, 5” x 3 ¾”
 Whisper White Envelope, Medium

Accessories:
 Aquapainter
 Powder Pal® Trays
 Stampin’ Glitter, Chunky Essentials
 2-Way Glue Pen
 Scalloped Square Punch
 Mini Glue Dots®
 Paper Snips
 Sizzix Die 4-Pack, Snowflakes Set #2
 Big Shot Die-Cut Machine
 Stampin’ Dimensionals

Wednesday, September 23, 2009

Brag Book Album - In Memorium


The Manhattan Flowers stamp set coupled with a saying from the Refuge and Strength stamp set are what I used to make this Brag Book Album.  I have posted brag books before, so Click Here to view them. if you want to see some different designs and directions.

If you are wondering what I put inside this one, it is full of pictures of someone dear to my family...Great Grandma Emily.  She was my husband's "adopted Canadian grandmother" and she passed away recently after living a wonderful life.  Long story short, but she and her husband ended up being just like grandparents to Erik while he was attending high school at Grenville Christian College.  Hence, she was given a special coursage and escorted down the aisle to a special seat at our wedding over eight years ago; we had the chance to visit with her and introduce her to our children on two seperate occassions in Canada; and, today we celebrate her life in memorial.  I didn't know her for too long, but she was a dear woman and I am sure she is in Heaven with the Lord today!

O.K., at any rate, Erik is off to the memorial today and asked me to pull together some pictures of our Canada trips for Emily's children.  So, that is why I made the Brag Books.  I hope they speak comfort to her family.  It was a blessing to know her!

Project Supplies:
Manhattan Flowers Stamp Set
Refuge & Strength Stamp Set
Night Of Navy CS
Brocade Blue CS & Ink
Old Olive CS & Ink
Staz On Ink - Black
Cropodile
Jumbo Eyelets
Wide Oval Punch
5/8" Grosgrain Ribbon - Old Olive
2-Way Glue Pen
Dazzling Diamonds Glitter
Powder Pal
Stampin' Sponges
Medium Envelopes - Clear
SNAIL
Stampin' Dimensionals

Thursday, September 3, 2009

Two Step Stamping - Dusty Durango Rose Friendship Card

I am a sucker for roses! I just love them. The way they smell. The different colors. Ooooo....I just love them! So, when SU! announced that it was retiring their "Wild Rose" set, I was so so so sad.....BUT, they must have known that I NEEDED a current rose set, and when the new catalog came out....VOILA....the "A Rose Is A Rose" set was there! Yippee! This set is just perfect! I love the Two-Step Stamping Technique and really enjoy showing it with this fabulous bunch of stamps. Thank you Stampin' Up!

I admit that yellow roses are my favorite, but to this day, I have yet to stamp a card with yellow roses.....that will need to change pronto! At any rate, when I saw the new In Colors, I HAD to try the Dusty Durango Ink with Pumpkin Pie. It is such a fabulous combonation. What do you think????


1. Fold your Old Olive CS in half and crease with the Bone Folder.
2. SNAIL Dusty Durango CS onto the gift card.
3. Stamp the following using 5 different stamps and the demo as a guide for placement:
· “Lg. Bold Rose” – Pumpkin Pie Ink
· “Lg. Rose Highlights” – Dusty Durango Ink
· “Bold Leaf” – Old Olive Ink
· “Leaf Highlights” – Garden Green Ink
· “Leaf with stem” -- Old Olive Ink
4. Stamp “frame” in Basic Black Ink onto Old Olive CS.
5. Using Stamp-A-Ma-Jig to help guide the placement stamp “You’re a friend…” inside the frame. Cut out using Paper Snips and use two Stampin’ Dimensionals to adhere over “Leaf with stem.”
6. Use 2-Way Glue Pen to lightly trace “friend.” Lay card in Powder Pal and sprinkle with the Fine Cosmo Glitter – Celery.

To place an order go to www.julietupper.stampinup.net .
I have listed all the items used in this project and the item numbers below to help you with your shopping! Feel free to email me with any questions at julietupper@gmail.com . Thanks!

Project Supplies:
113792 Great Friend $17.95 p107
111560 A Rose Is A Rose $37.95 p99
115654 Dusty Durango Classic Ink Pad $5.95 p155
105216 Pumpkin Pie Classic Ink Pad $5.95 p156
102277 Old Olive Classic Ink Pad $5.95 p156
102272 Garden Green Classic Ink Pad $5.95 p156
101179 Basic Black Classic Ink Pad $5.95 p155
100702 Old Olive Cardstock, 8 ½” x 5 ½”, scrap$5.50 p156
100730 Whisper White Cardstock, 3 ¾” x 5” $7.50 p155
115321 Dusty Durango Cardstock, 4” x 5 ¼” $5.50 p155
101049 Stamp-A-Ma-Jig $11.95 p191
104430 Stampin’ Dimensionals $3.95 p192
108796 Fine Cosmo Glitter $13.95 p180
102197 Powder Pals $19.95 p188
100425 2-way Glue Pen $3.50 p192

103579 Paper Snips $9.95 p191

Wednesday, February 11, 2009

Love YOU Much

I am enjoying the Love You Much Stamp Set immensely! Here is another creation using it. This card uses the Stampin' Pastels to color on the Basic Black CS.

Chalking -- Poppin' Pastels Directions:
1) Stamp the image with a White or Vanilla Craft Stampin' Pad. You may also use a VersaMark ink pad.
2) Use sponge daubers or stamping sponges to apply the pastel color directly to the ink.
3) Blow off any excess pastel powder or use a tissue to wipe. (Repeat process if using this technique with a Two-Step Stampin' set).


Project Supplies:
  • Love You Much Stamp Set
  • Pink Passion CS
  • Basic Black CS
  • Whisper White Craft Ink
  • Stampin' Pastels
  • Sponge Daubers
  • Whisper White Tafetta Ribbon
  • UniBal SINGO White Gel Pen
  • 2-way Glue Pen
  • Stampin' Glitter - Dazzling Diamonds
  • Powder Pal Tray

Saturday, December 6, 2008

3-D Fish Tank Fun

For the past week my daughter has been asking, nagging, begging me to make her a fish tank. "Just like the one we saw, Mom. You know the one. Pleeeeeeeeeeeasssssssssssssssssse!" Oh my, how can I resist? My daughter begging to stamp with me!?! Only, I kept stalling. I could not quite figure out how I wanted to go about it to make it just right.

Today, I told her this morning was the time to finally do it. My only problem is that when I am creating on the fly [without a template or picture to copy] I need quiet....no music, no kids, no phone. [That is why I generally do my best work at 11pm!] However, today is a family Saturday...a pajama day....a day that we have not had in a long time, so to shoooo everyone away was not an option. So, "E" stamped and created a variety of items [fish food] for her fish tank, while I created the tank itself. With my husband's music blaring from the stereo and "Mommy, why are you doing that?" "Mommy, what is that for?" "Mommy, can I help?" Sigh..."yes, of course.", it took 2-1/2 hours for us to finalize it, but here is the final creation.

I know it may seem that I am complaining, but I do not intend to do so. I am blessed with my family and I love them so much! I love to stamp with "E", but for some reason this morning I was all stressed about it. Sigh....good memories, right? I hope this creation lasts a long time for her to enjoy. My fabulous husband thought it was "very cool." Phew!

  • The window is made with a Large Cello bag, hair gel & glitter. I didn't have an zip-loc bags big enough, so I SNAILed and Sticky Taped it shut REALLY tight to make sure we didn't have a leak in the fish tank. The "water" is layered between the outside Tempting turquoise layer and the inside Whisper White front layer with TONS of Sticky Tape. Great stuff!
  • Next time, I think I might add some fish inside with the "water." That way there are some that float around!
  • This is a free standing 3-D project, so that "E" can feed the fish!
Project Supplies:
Life's A Breeze Stamp Set
Something Fishy Jumbo Wheel
Brilliant Blue Ink, CS & Jumbo Wheel Cartridge
Tempting Turquoise CS
Whisper White CS
Pink Passion Ink
Only Orange Ink
YoYo Yellow Ink
Garden Green Ink & CS
Stampin' Pastels
Sponge Daubers
Dazzling Diamonds Glitter
Jumbo Wheel Handle
Coluzzle Cutting System
Hobby Blade
Cutting Mat
Large Cello Bag
Sticky Tape
SNAIL Adhesive
Mini Glue Dots
Paper Snips
Hair Gel

Monday, December 1, 2008

Chunky Glitter BIG SHOT Snowflakes Card

HAPPY DECEMBER EVERYONE! My family is back from Texas where we enjoyed 70 degree weather and sunny days playing outside on vacation [hence the long time between posts]. Thanksgiving is over and so is November. Christmas is coming, and I am dreaming of a white one!

O.K. I admit it...can you tell?.... I am officially ready for SNOW! I love this card because it looks like a wonderfully, beautiful snowy day at home to me. Enjoy the tutorial!


Chunky Glitter Snowflakes
Stamp Sets:
Punches Three (#111674, p.17, Hostess Level 1)
Inks:
Stampin‘ Write Marker, Night of Navy (#100069, p.165, $3.25)
Watercolor Wonder Crayons, Rich Regals (#106698, p.163, $19.95)
Paper:
Whisper White Card Stock, 5 ½” x 8 ½”, scrap (#100730, p.163, $7.50)
Night of Navy Card Stock, 4 ¼” x 5 ½”, scrap (#100867, p.166, $5.50)
Watercolor Paper, 5” x 3 ¾” (#105019, p.166, $6.95)
Whisper White Envelope, Medium (#107301, p.167, $6.50)
Accessories:
Aquapainter (#103954, p.193, $16.95)
Powder Pal® Trays (#102197, p.190, $19.95)
Stampin’ Glitter, Chunky Essentials (#108797, p.190, $15.95)
2-Way Glue Pen (#100425, p.191, $3.50)
Scalloped Square Punch (#112081, p.188, $15.95)
Mini Glue Dots® (#103683, p.191, $4.95)
Paper Snips (#103579, p.192, $9.95)
Sizzix Die 4-Pack, Snowflakes Set #2 (#113449, p.31 mini, $19.95)
Big Shot Die-Cut Machine (#113439, p.27 mini, $99.95)
Stampin’ Dimensionals (#104430, p.191, $3.95)

Comments: Fold the Whisper White CS gift card. Adhere Night of Navy CS to card front. Using Watercolor Wonder Crayons color streaks across the Watercolor Paper from top to bottom: Night of Navy, Ballet Blue, Brocade Blue, Ballet Blue, Night of Navy. Blend colors with the Aquapainter. Allow to dry. [This paper will curl up when wet, but will dry flat.] Die-cut SIX small snowflakes [2 Night of Navy, 4 Whisper White]. [See directions at BIG SHOT station]. Adhere the Watercolor Paper to the card front. Adhere the white snowflakes with one Mini Glue Dot each. Adhere other snowflakes to top. Ink “A very merry…” by brushing Night of Navy Marker across the image and stamp on provided scrap Whisper White CS. Punch out with the Scalloped Square Punch. Trim with Paper Snips and adhere with Stampin’ Dimensionals. Place card in Powder Pal® tray. Apply 2-Way Glue in swirls to card front and across some of your snowflakes. Cover with glitter, then tap the card stock firmly to remove excess glitter. Pour glitter into jar.

Saturday, June 7, 2008

Fresh Cuts Die-Cut Notes 4x4 card

I LOVE THIS SET!
I LOVE THESE DIE-CUTS!
I CAN'T WAIT TO SEE THE NEW CATALOG IN AUGUST!


I made this card using the Brand NEW Fresh Cuts Stamp Set and the matching Die-cut 4x4 cards. Through the month of June, SU! is running a promotion giving you the chance to purchase the stamp set for $21.95 and get the coordinating Fresh-Cut Notes for $5! I couldn't pass it up!

Watch for a class I will be annoucing soon. Where you will be....well...details to come SOON!

FYI: The die-cut cards are on Whisper White CS. I colored this one Brilliant Blue by rubbing the ink pad directly onto the CS.

Instructions:
  • First, make your Build-A-Brad by sticking a 1/2" circle flower from the Build-A-Flowers[Wild Wasabi circle with White Flower] onto the brad base. Rub Crystal Effects [C.E.] onto the top and dip into Dazzling Diamonds Glitter. Add a tad more C.E. and adhere the "bubble". Allow to dry while you create the rest of the card.
  • Rub the Brilliant Blue Classic Ink.
  • Stamp randomly in Versamark with the "flowered vine" stamp. Dust with Crystal Clear Embossing Powder over your Powder Pal and heat with Heat Tool.
  • Tear 1/2" off the side with the Tearing Edge and remove the die-cut petals.
  • Add a white Build-A-Flower accent to the middle and punch [careful not to rip the CS] with the 1/8" Circle Punch. Add Build-A-Brad creation.
  • Stamp the biggest stamp in the set onto 3-15/16" x 3-15/16" Wild Wasabi CS and adhere to the card.
  • Tie Wild Wasabi Double Stitched Ribbon to card.
  • You are DONE!
Enjoy!

Wednesday, March 12, 2008

Everyday Inspiration

Today I received a flyer from a local store advertising a bedding set that was really beautiful. I looked at it for a while only to realize I didn't want the set, but I loved the color combination and design! [You know you have "Stampin' Sickness" when you start to look at flyers and dream of card designs instead of wanting the item for your house!!! Hahaha!] So, I clipped it out and created these three cards based on the color design. Let me know what you think!

I would love to know if you have your own everyday inspiration. Please e-mail me with a picture of your creation! I would enjoy seeing what you create! --Julie


Project Supplies:
Boho Backgrounds Stamp Set
Bashful Blue CS
Chocolate Chip CS
Chocolate Chip Classic Ink Pad
Silver Hodgepodge Ribbon Slide [SU! Occasions Mini]
Chocolate Chip 5/8" Grosgrain Ribbon
Craft & Paper Scissors


Project Supplies:
Boho Backgrounds Stamp Set
Brocade Basics Stamp Set
Bashful B
lue CS
Chocolate Chip CS
Chocolate Chip Classic Ink Pad
Bashful Blue Classic Ink Pad
Bashful Blue Stampin' Write Marker
So Saffron Stampin' Write Marker
Scallop Punch
1-3/8" Square Punch
Boho Punch
1/8" Circle Punch


Project Supplies:
Brocade Basics Stamp Set
Bashful Blue CS
Chocolate Chip CS
Chocolate Chip Classic Ink Pad
Silver Hodgepodge Ribbon Slide [SU! Occasions Mini]
Chocolate Chip 5/8" Grosgrain Ribbon
Craft & Paper Scissors
Crystal Effects
Dazzling Diamonds Glitter
Related Posts with Thumbnails